
In this blog, we will delve into the significance of comprehending the mechanics of upper body behinding and rotation.
First, let’s establish a clear understanding of the terminology we’ll be employing:
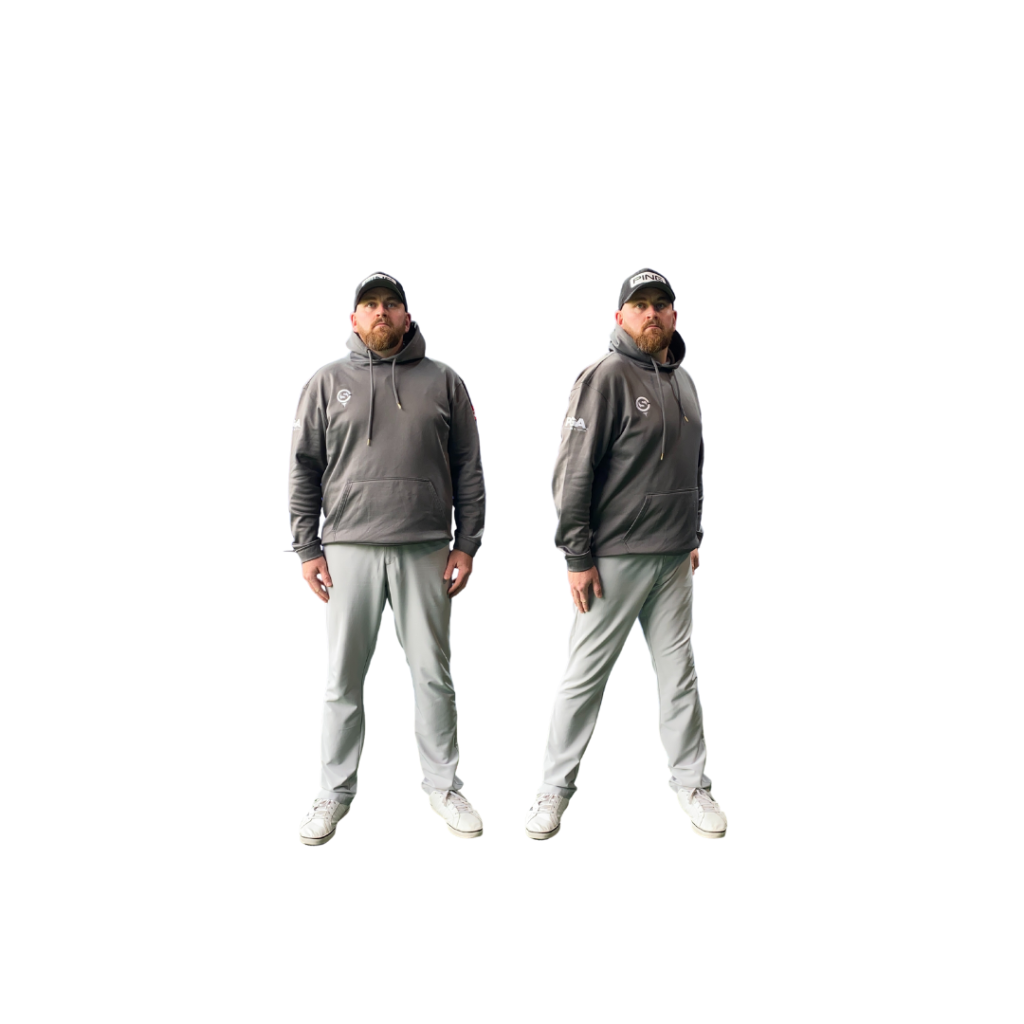
Upper Side Bend: This term describes the tilting of the upper body to one side.
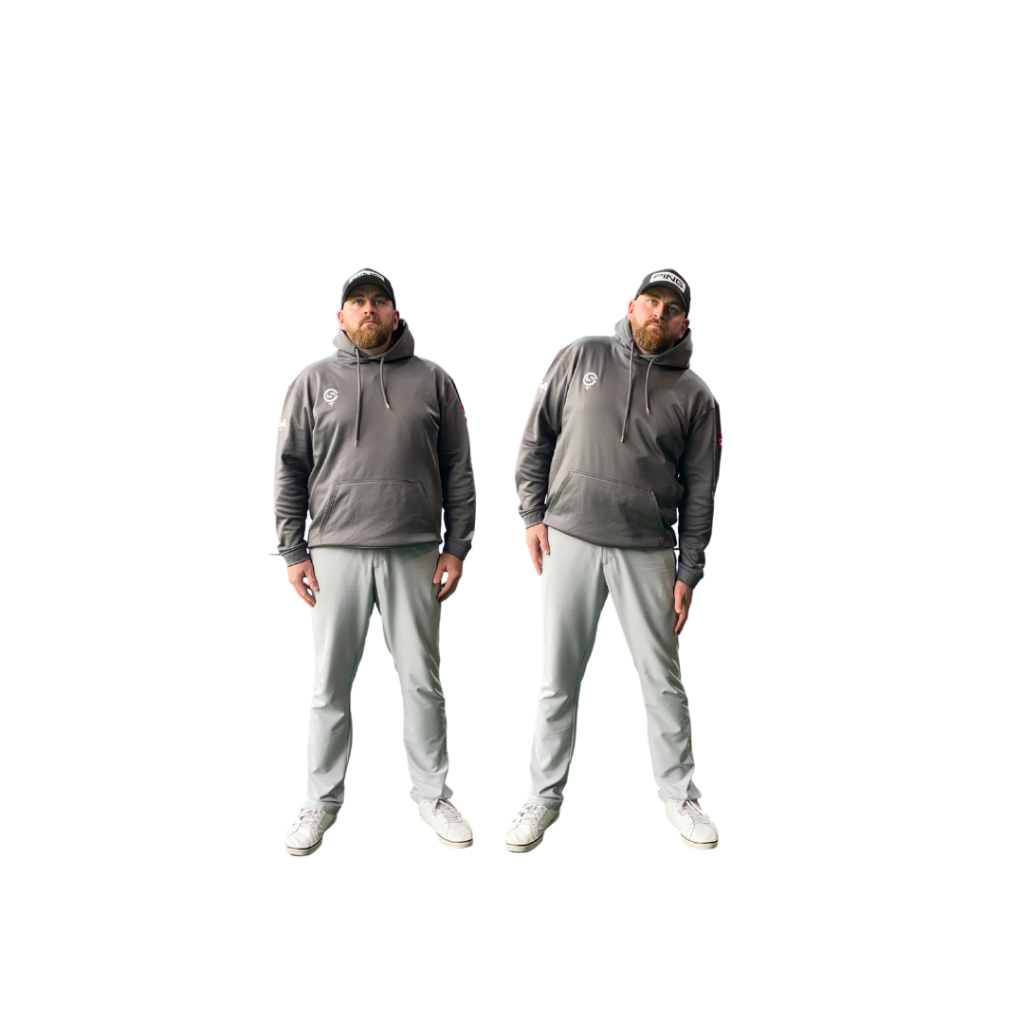
Forward Bend: This term signifies the upper body bending forward toward the ground.

Back Bend: We refer to the upper body bending backward, away from the ground.
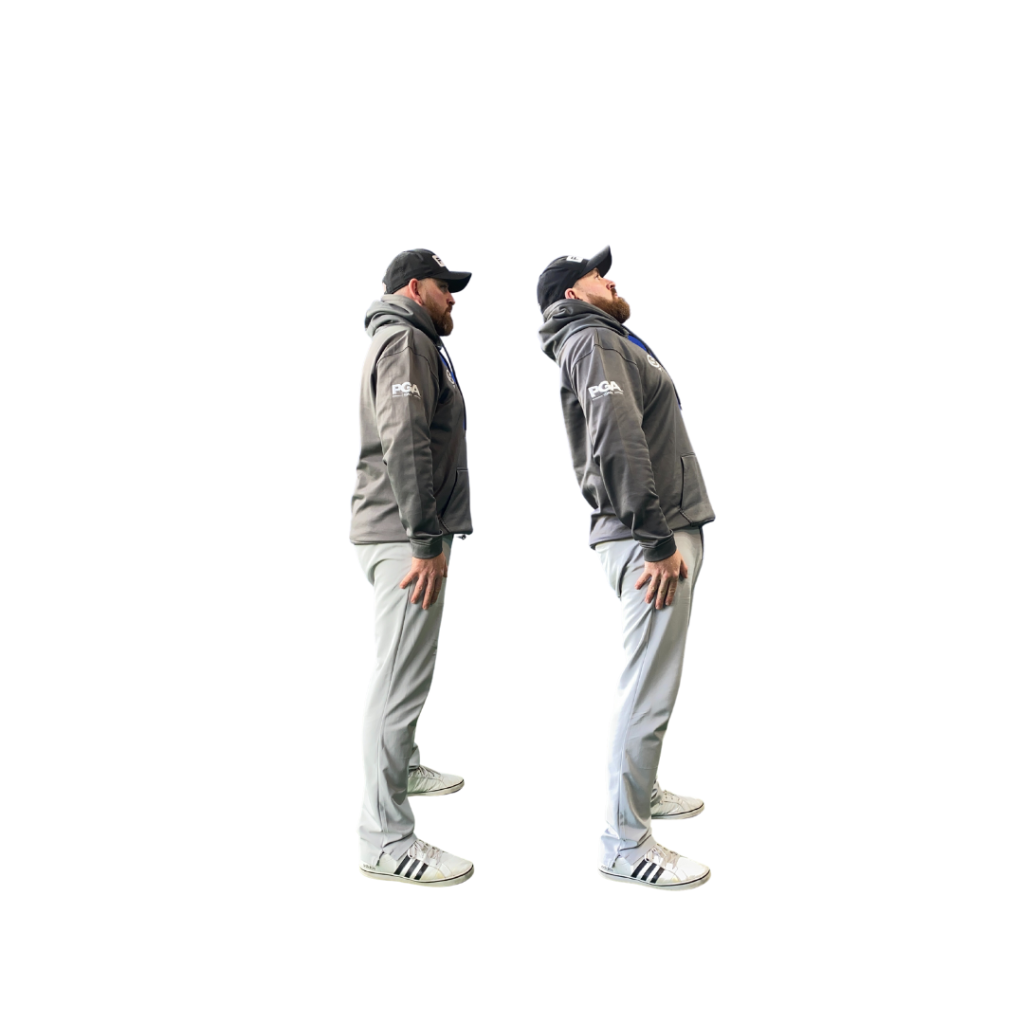
Rotation: Involves the elegant turning of the torso around the spine.
As we delve into the mechanics of the golf swing, it becomes evident that the backswing is a complex interplay of rotation, side bend, and extension. These elements harmoniously combine to facilitate a seamless backswing. However, it’s worth highlighting the pivotal role played by the lower body, which provides the essential foundation for the upper body’s proper movement without any necessary adjustments. In this blog post, our primary focus will be on dissecting the intricate nuances of the upper body’s contribution to the golf swing.
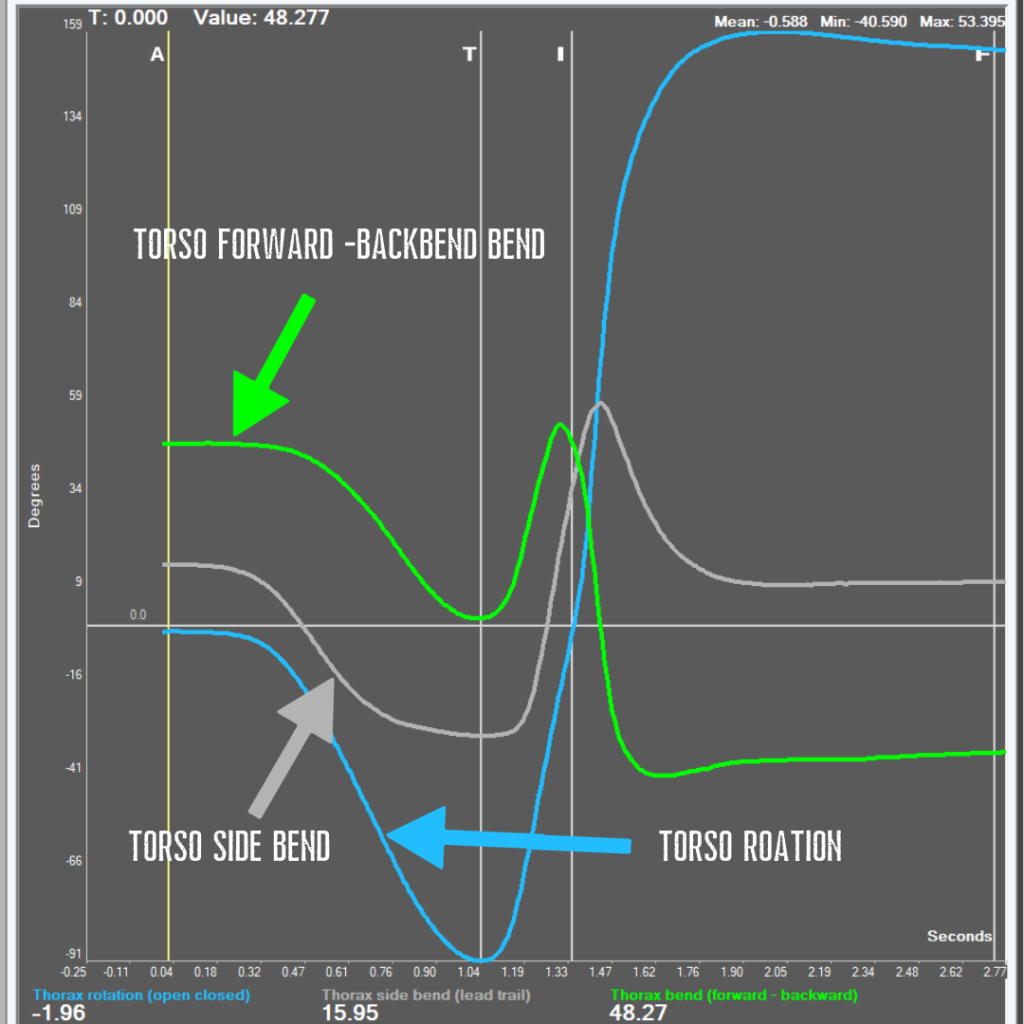
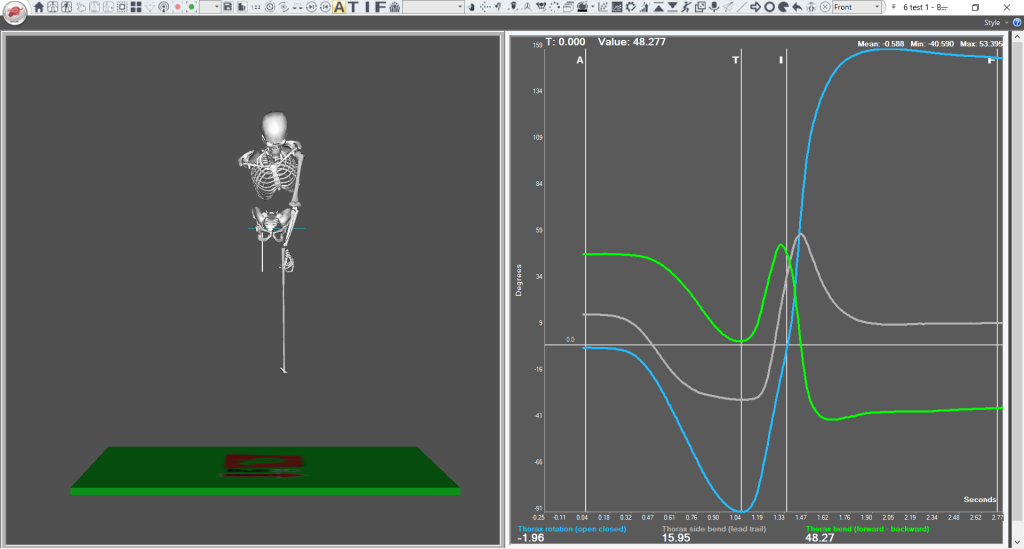
To gain a deeper insight into the mechanics, we will leverage 3D data analysis, drawing inspiration from a PGA Tour major winner who boasts an impressive track record of securing multiple major titles. In our exploration, we’ll utilize a 3D skeleton visualization on the left, complemented by an illustrative graph on the right.
This graph serves as a dynamic representation, capturing the intricate dynamics of rotational movement, side bend, and the subtle shifts in forward and backward lean within the upper torso during the backswing.
We also have a vedio to expalin more about this graph.
Let’s take a closer look at how the golfer’s upper body positions evolve from P1 to P5, illustrating the journey from the address to the top of their swing.
As we observe the movement, a yellow line will guide us, representing the timeline of each stage of this dynamic process.
Starting at P1, the address position, we see a vital aspect of the player’s setup. The green line is noticeably above the 0 line, indicating a forward bend in their posture. Moreover, the side bend is also above the 0 line, signifying that the lead shoulder is higher than the trail side. The rotation is nearly at the 0 line, showing an excellent setup position, particularly suited for a mid-iron shot.
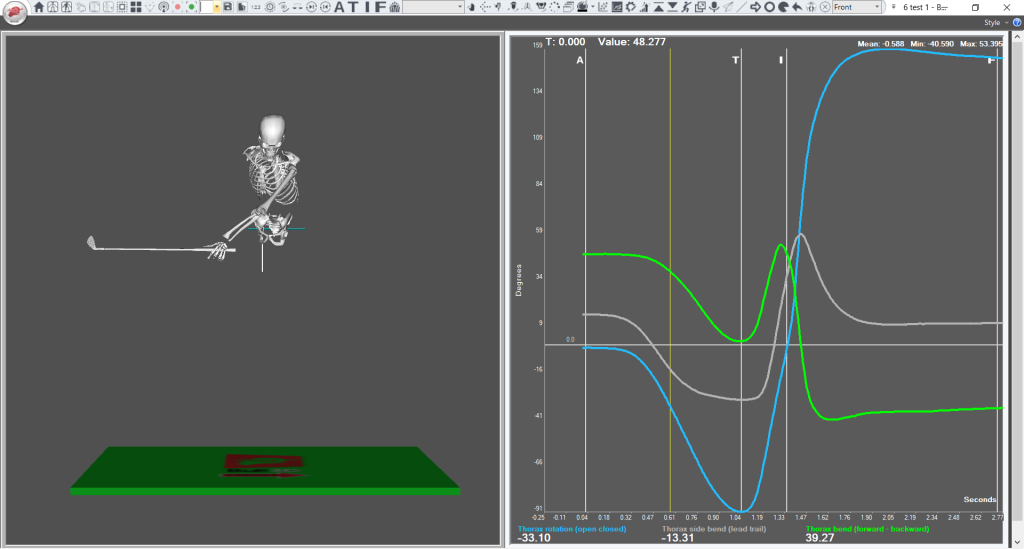
Moving on to P2, we witness a shift as the player initiates their backswing. They begin moving back towards a backbend, with the lead shoulder dropping below the 0 line, and the rotation starts moving forward below the 0 line. What’s impressive here is how all three components follow a similar shape, demonstrating the golfer’s proficiency.
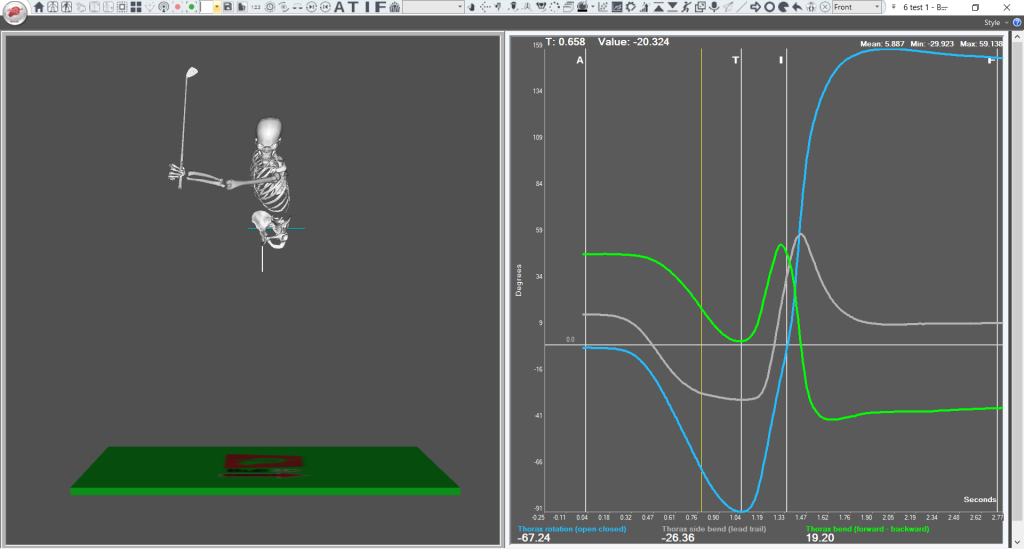
At P3, with the shaft now vertical, the forward bend (green line) continues to transition towards backbend. The lead shoulder maintains its forward movement away from the 0 line, and the rotation still operates below it. This stage showcases the player’s consistency and control.
Finally, at P4, the top of the backswing, we observe that the green line almost touches but does not cross the 0 line. This indicates that the player did not shift into backbend at the top of their swing. Meanwhile, the lead shoulder starts moving down below the 0 line as the transition into the downswing begins, and the rotation, represented by the blue line, returns towards the 0 line.
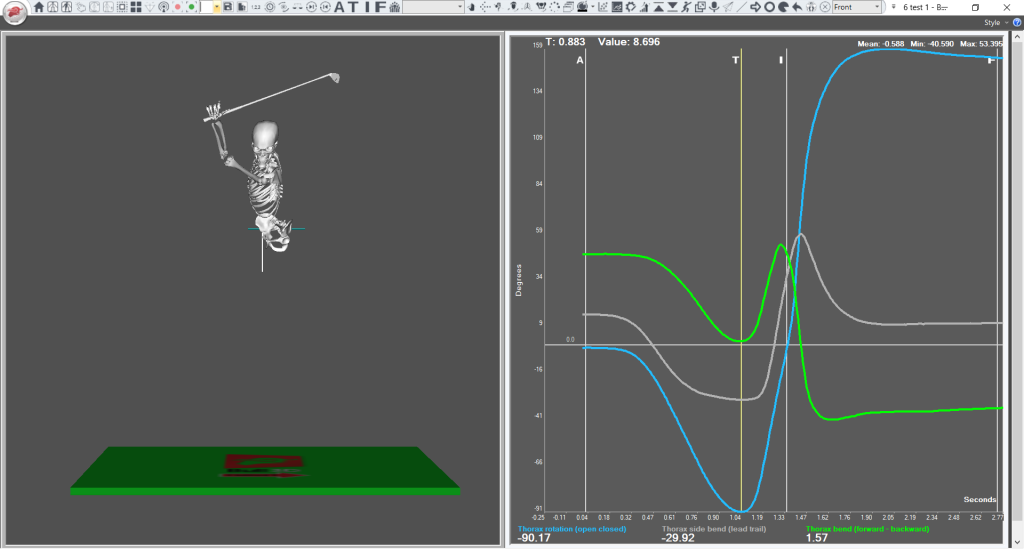
This analysis provides valuable insights into the golfer’s upper body movement. It challenges common misconceptions, where some believe that the upper body should stay in a forward bend or move into extension at the top of the swing. As we can see, the reality is more nuanced.
To ensure proper functioning of the upper body, it’s crucial for the lower body to also move effectively.
For a live demonstration and a deeper understanding of these positions, I encourage you to check out the accompanying video, where I explain these concepts in real-time.
0 Comments